Verify all bolts are parallel arms are tight. This is a common reason bushing wear out. Test to see if your parallel arms are wore. See the short video below for explanation. We look to have less than 2″ of vertical travel and 1″ of horizontal travel in our parallel arms at the back of the row unit.
– Prior to planting season you will want to go through all your rows of the planter and ensure that the blades are shimmed properly. This will ensure you are reaching proper planting depths and reduce the possibility of getting a W to form in the bottom of the trench.
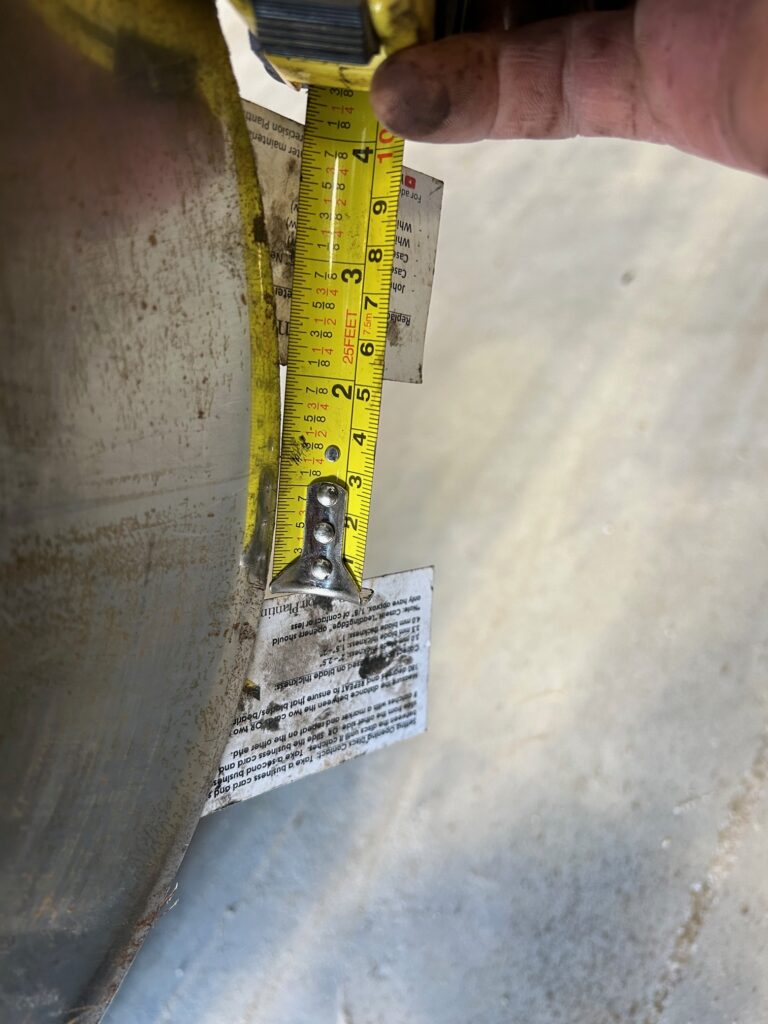
– The process to measure the blade gaps is, Grab two business cards, slide one on each side as seen in the picture below until you can’t slide them anymore and measure that gap. For 3.0mm blades you want 2-2.5″ of gap, for 3.5mm you want 1.5-2″ of gap, and for 4.0mm blades you will want a 1″ gap. *For Case IH leading edge blades you want less the 1/8″ of contact between the blades.
Inspect gauge wheels for excessive wear. This will look like chunks of rubber missing, or they do not spin symmetrically along the disc openers. Additionally you will want to shim the gauge wheels. See the two images below for an example of what you do not want to see versus what is ideal.
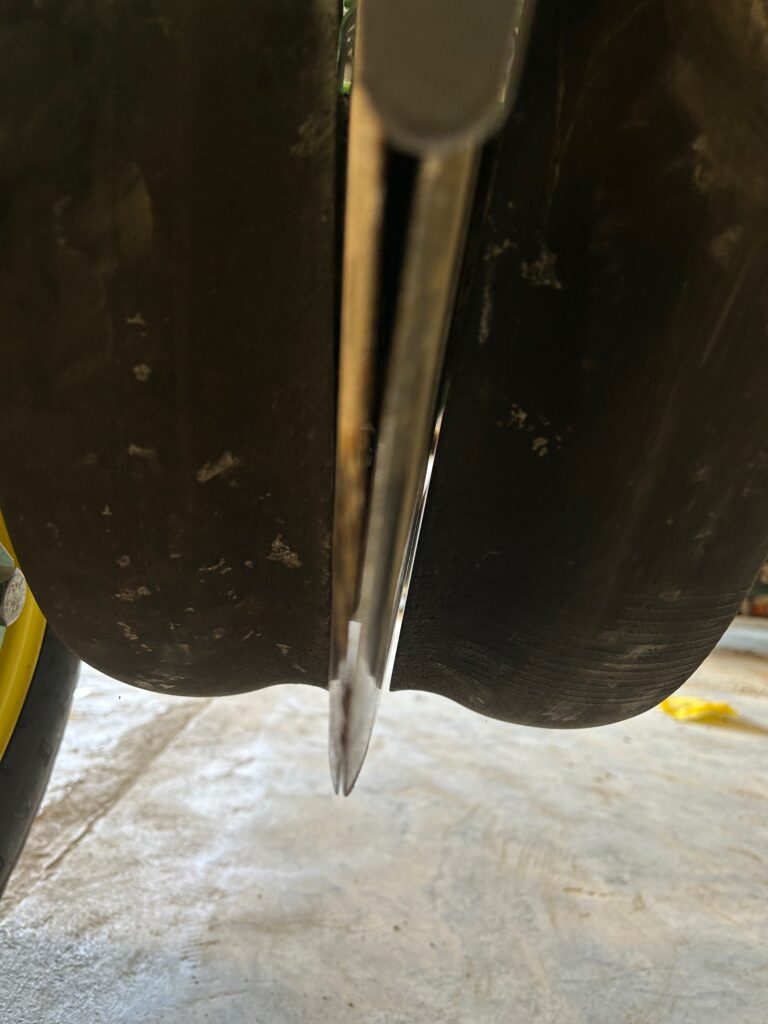 Here we see a gap between the gauge wheel and the disk opener. With this gap it will cause collapse and issues in the furrow. Here we see a gap between the gauge wheel and the disk opener. With this gap it will cause collapse and issues in the furrow. | 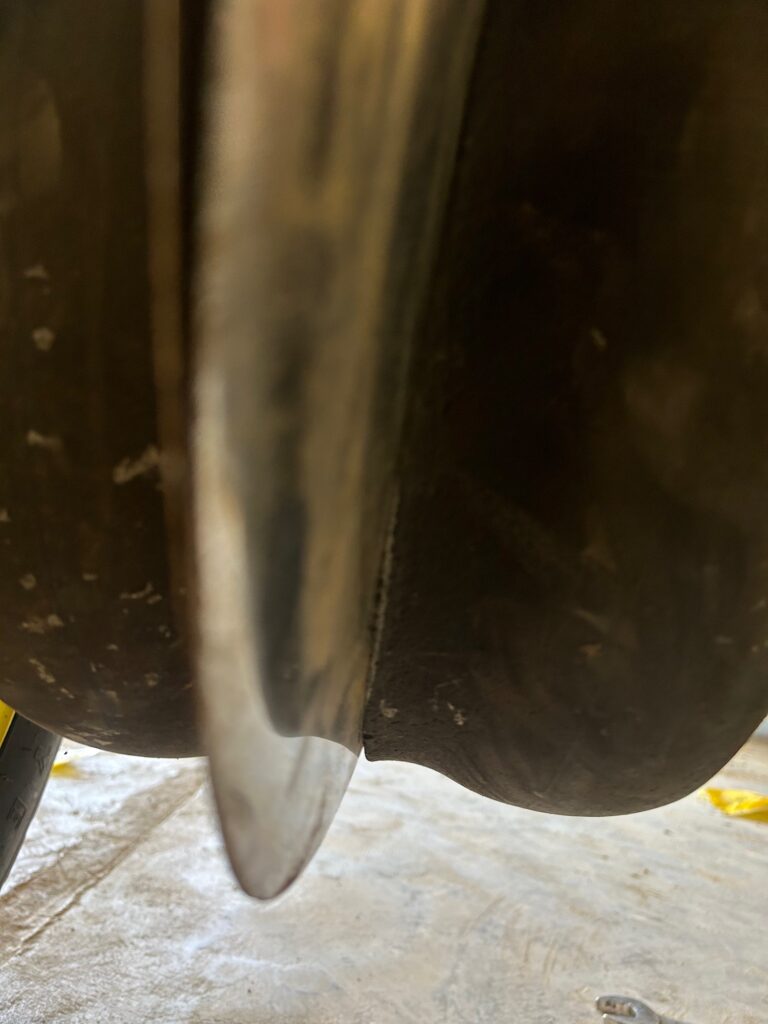 Here the gauge wheel is just rubbing on the disk opener. The proper setting will allow you to spin the gauge wheel while feeling a little resistance from the disk openers. Here the gauge wheel is just rubbing on the disk opener. The proper setting will allow you to spin the gauge wheel while feeling a little resistance from the disk openers. |
On our gauge wheel arms we want to look for fitting and or missing material at the connection points. Each make and model has different points to look for wear.
Depending on your row unit the determination of a worn out guard varies. Below you can see there are a few ways to detect a worn out part from your major OEM’s.
The big thing that needs to be checked on your closing wheels is alignment with the furrow. This can be accomplished by completing a scribe test. Additionally, you will want to check your closing wheels for any lose bolts or excessive slop in the adjustment linkages.
For row cleaner maintenance you will want to make sure to grease them if your row cleaners have the ability to have it done.
Within the meter there are a few parts that are good to check on for wear prior to planting. 1- check your vacuum seals, look for dry rot, cracks, and missing portions of it. 2- Inspect double eliminator for excessive wear this is a key component in ensuring a successful plant stand.
Another tip to ensuring that your meter performance on day one of planting is excellent, if you planter has to ability to be “runoff”, I would highly recommend utilizing this feature to alleviate issues on day 1 of planting season.